You can click on the pictures to see them in a larger size.
Pic 1.

Last night i promised that i would let the readers decide wich fly was to be next.
As of now, the fly with most votes is a shrimpfly pattern, the is called RAIN.
Due to some of the voters being foreign i will write this Step by Step in english.
Set the hook in the vise, in this case, a mustad stinger size 4.
bend the hookeye down towards the point of the hook, this maneuver is to ensure better Upside/down presentation in the water.
Pic 2.
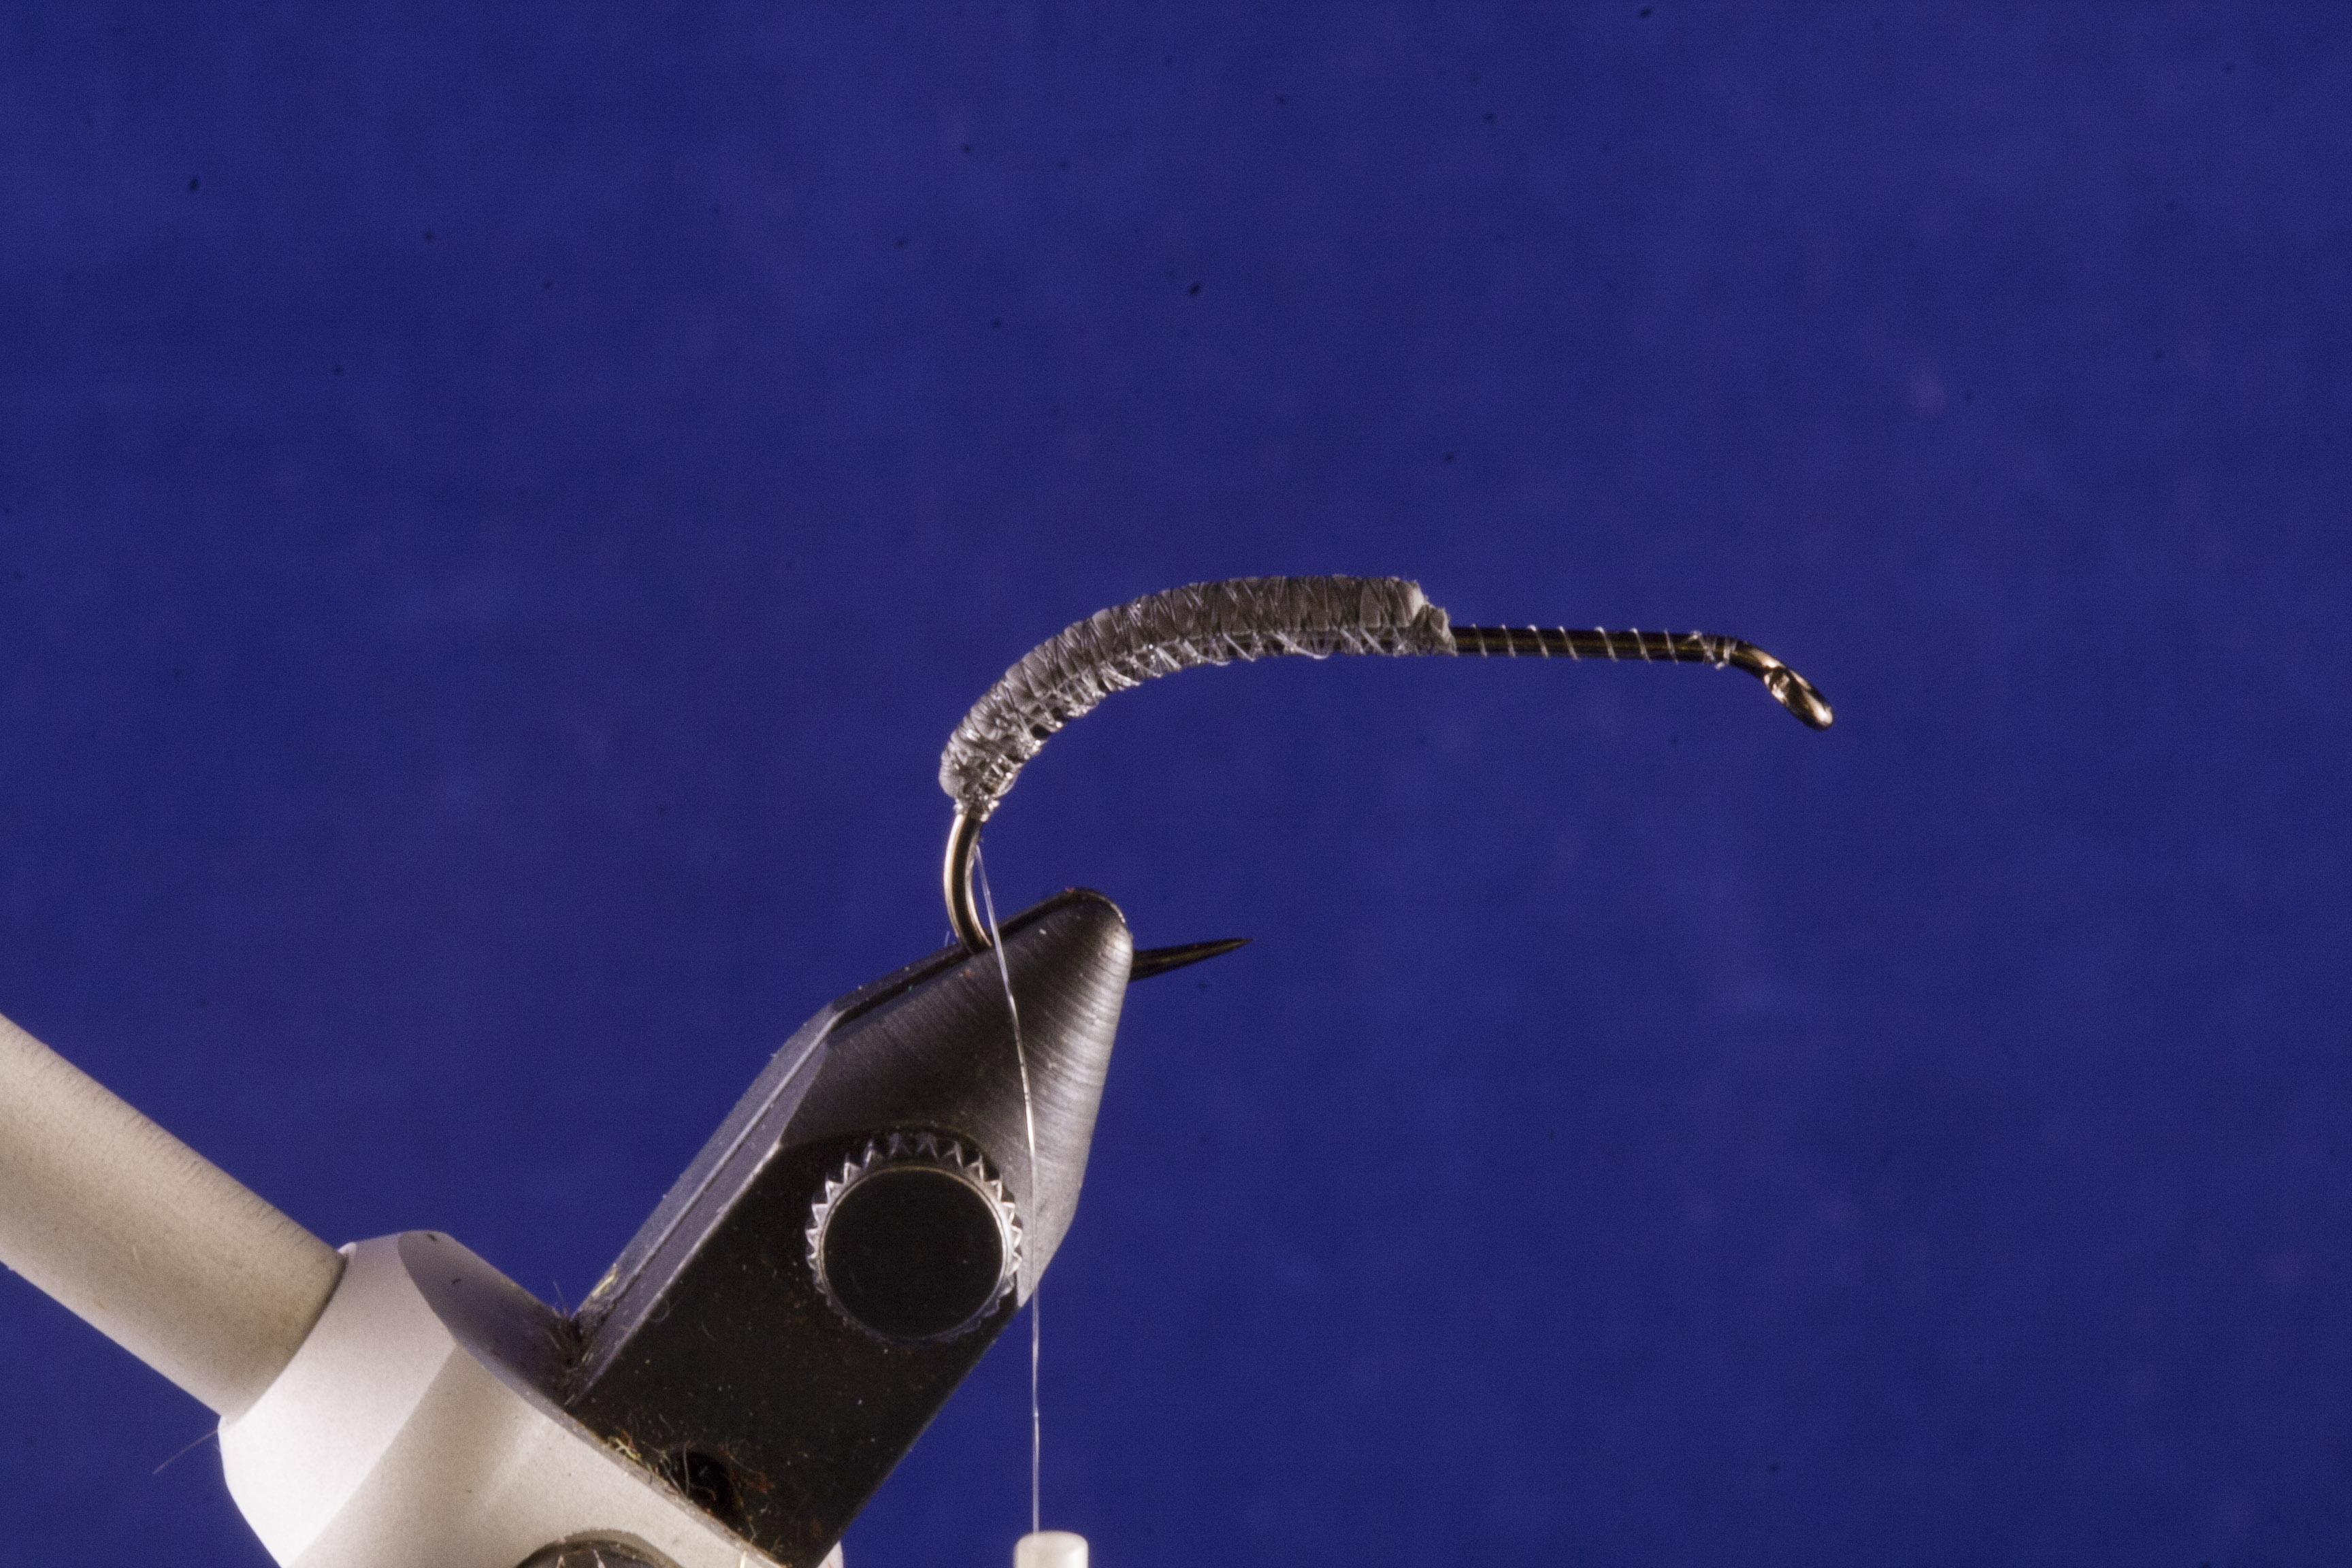
Add som weight on the downside of the hookbend, in this case i have used the Futurefly Flexible Tungsten for weightmaterial.
Pic 3.

Dub the tying thread with STF dubbing and make a “ball” of dubbing where you want your shrimp to start.
Pic 4.

Tie in a nylonrib and put the rib over the vise for later use, now tie in the eyes of the fly, set the eyes equal in lenght on both sides of the hook and in an 45 degrees angle from the shank.
Pic 5.

Tie in the first pair of legs any rubber material will do, but i like to use vinylrib for legs. After tying legs, dub the shrimp body further down the bend.
Pic 6.

Tie in second pair of legs and dub again.
Pic 7.

Tie in 3rd pair of legs, you can make a 4th pair if you like, but i have chosen 3 pairs, so now, dub the fly to the hookeye.
Pic 8.

Use a HOTPOINT tool for making the right bend on the legs, with a little training, this procedure dramatically reduces the time from tying knots on each rubber leg and tying them in at the right angle and direction.
Ps. the hotpoint wont work with sillylegs, so try on your leg materail before tying the fly to see if it is possible with the hotpoint.
Pic 9.
Tie in som EP fiber at the hookeye, one part pointing backwards and another pointing forward.
Pic 10.

Now take the EP fiber poining backwards and mix it with forward pointing clump.
Pic 11.

Cut out a piece of thinskin in the coorect lenght and cut a V-shape in one end and slightly tapered in the other end.
Pic 12.

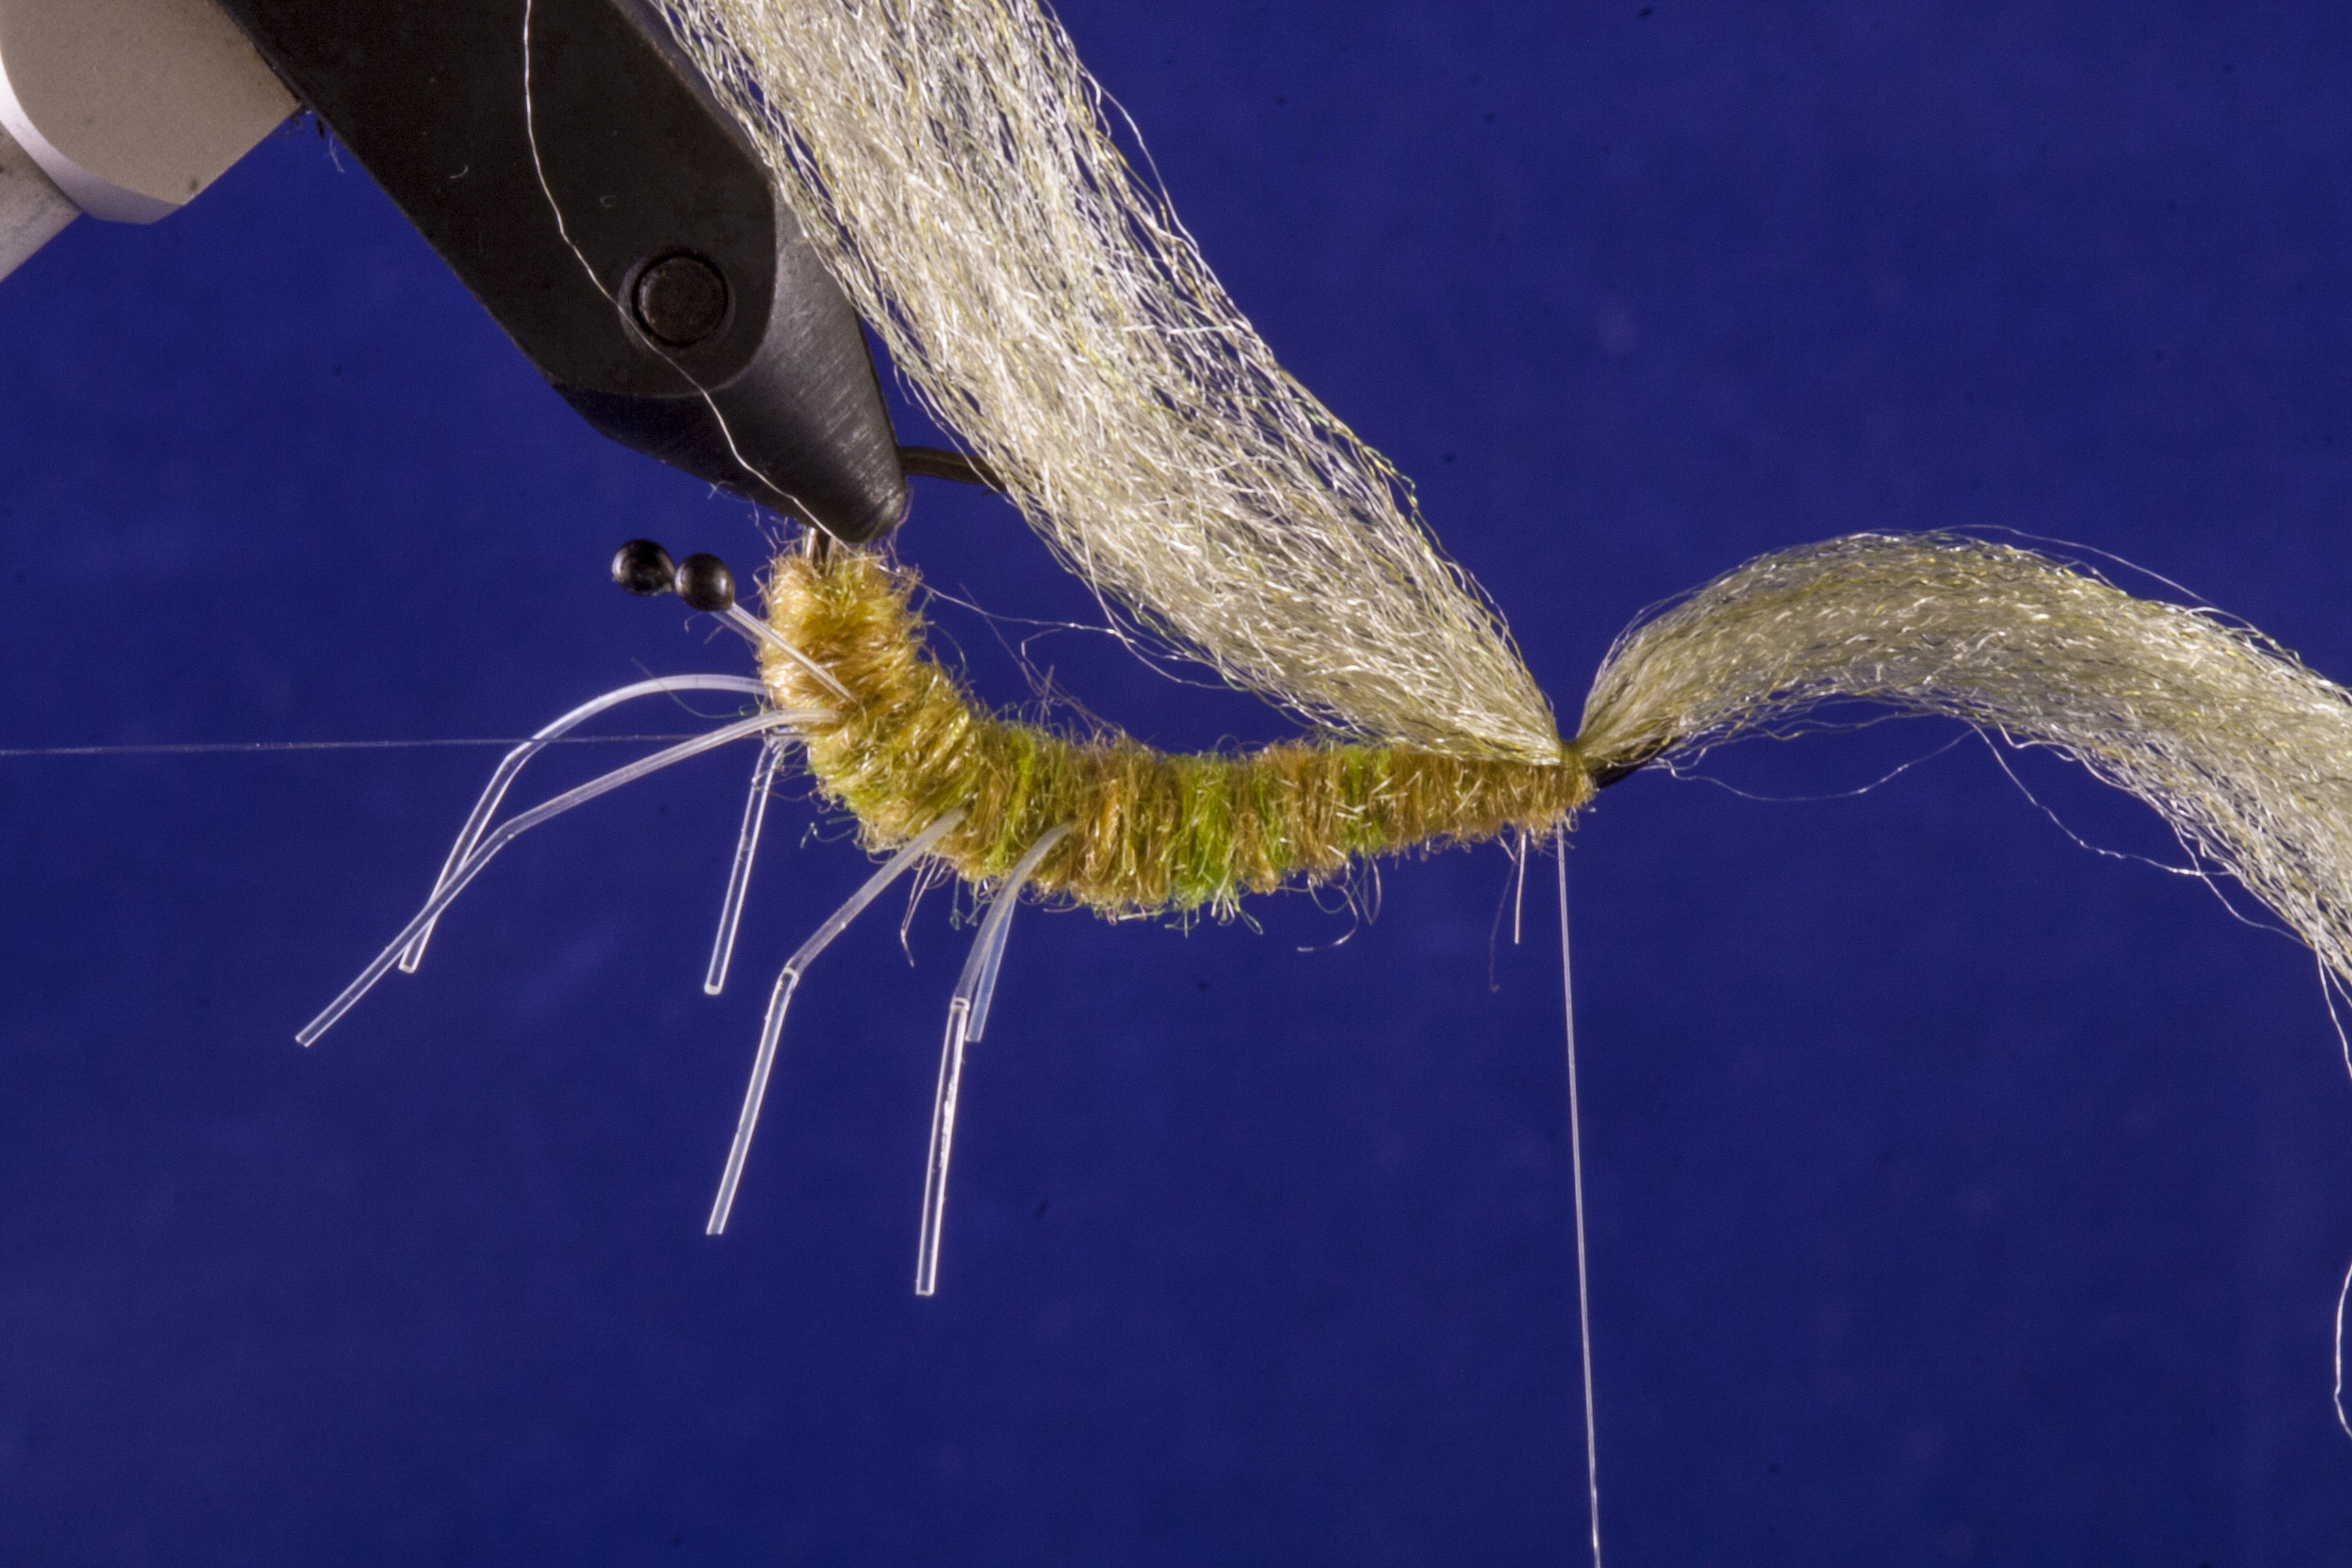
The rib most be used at this point, put down your piece of thinskin on top of the epfiber, when everything in place, start to rib the fly towards the hookeye, making the distance between the rib turns, smaller and smaller. be carefull not to touch the legs as you are ribbing the fly.
Pic 13.

Take a pair of scissors, preferably scissors that are made especially for thinning is good for this part.
Cur the EP fiber in your desired lenght.
Use a dubbing rake to rake out the dubbing underneath the fly.
Pic 14.

This is what the finished fly should look like, or, what i think it should look like.
Pic 15.
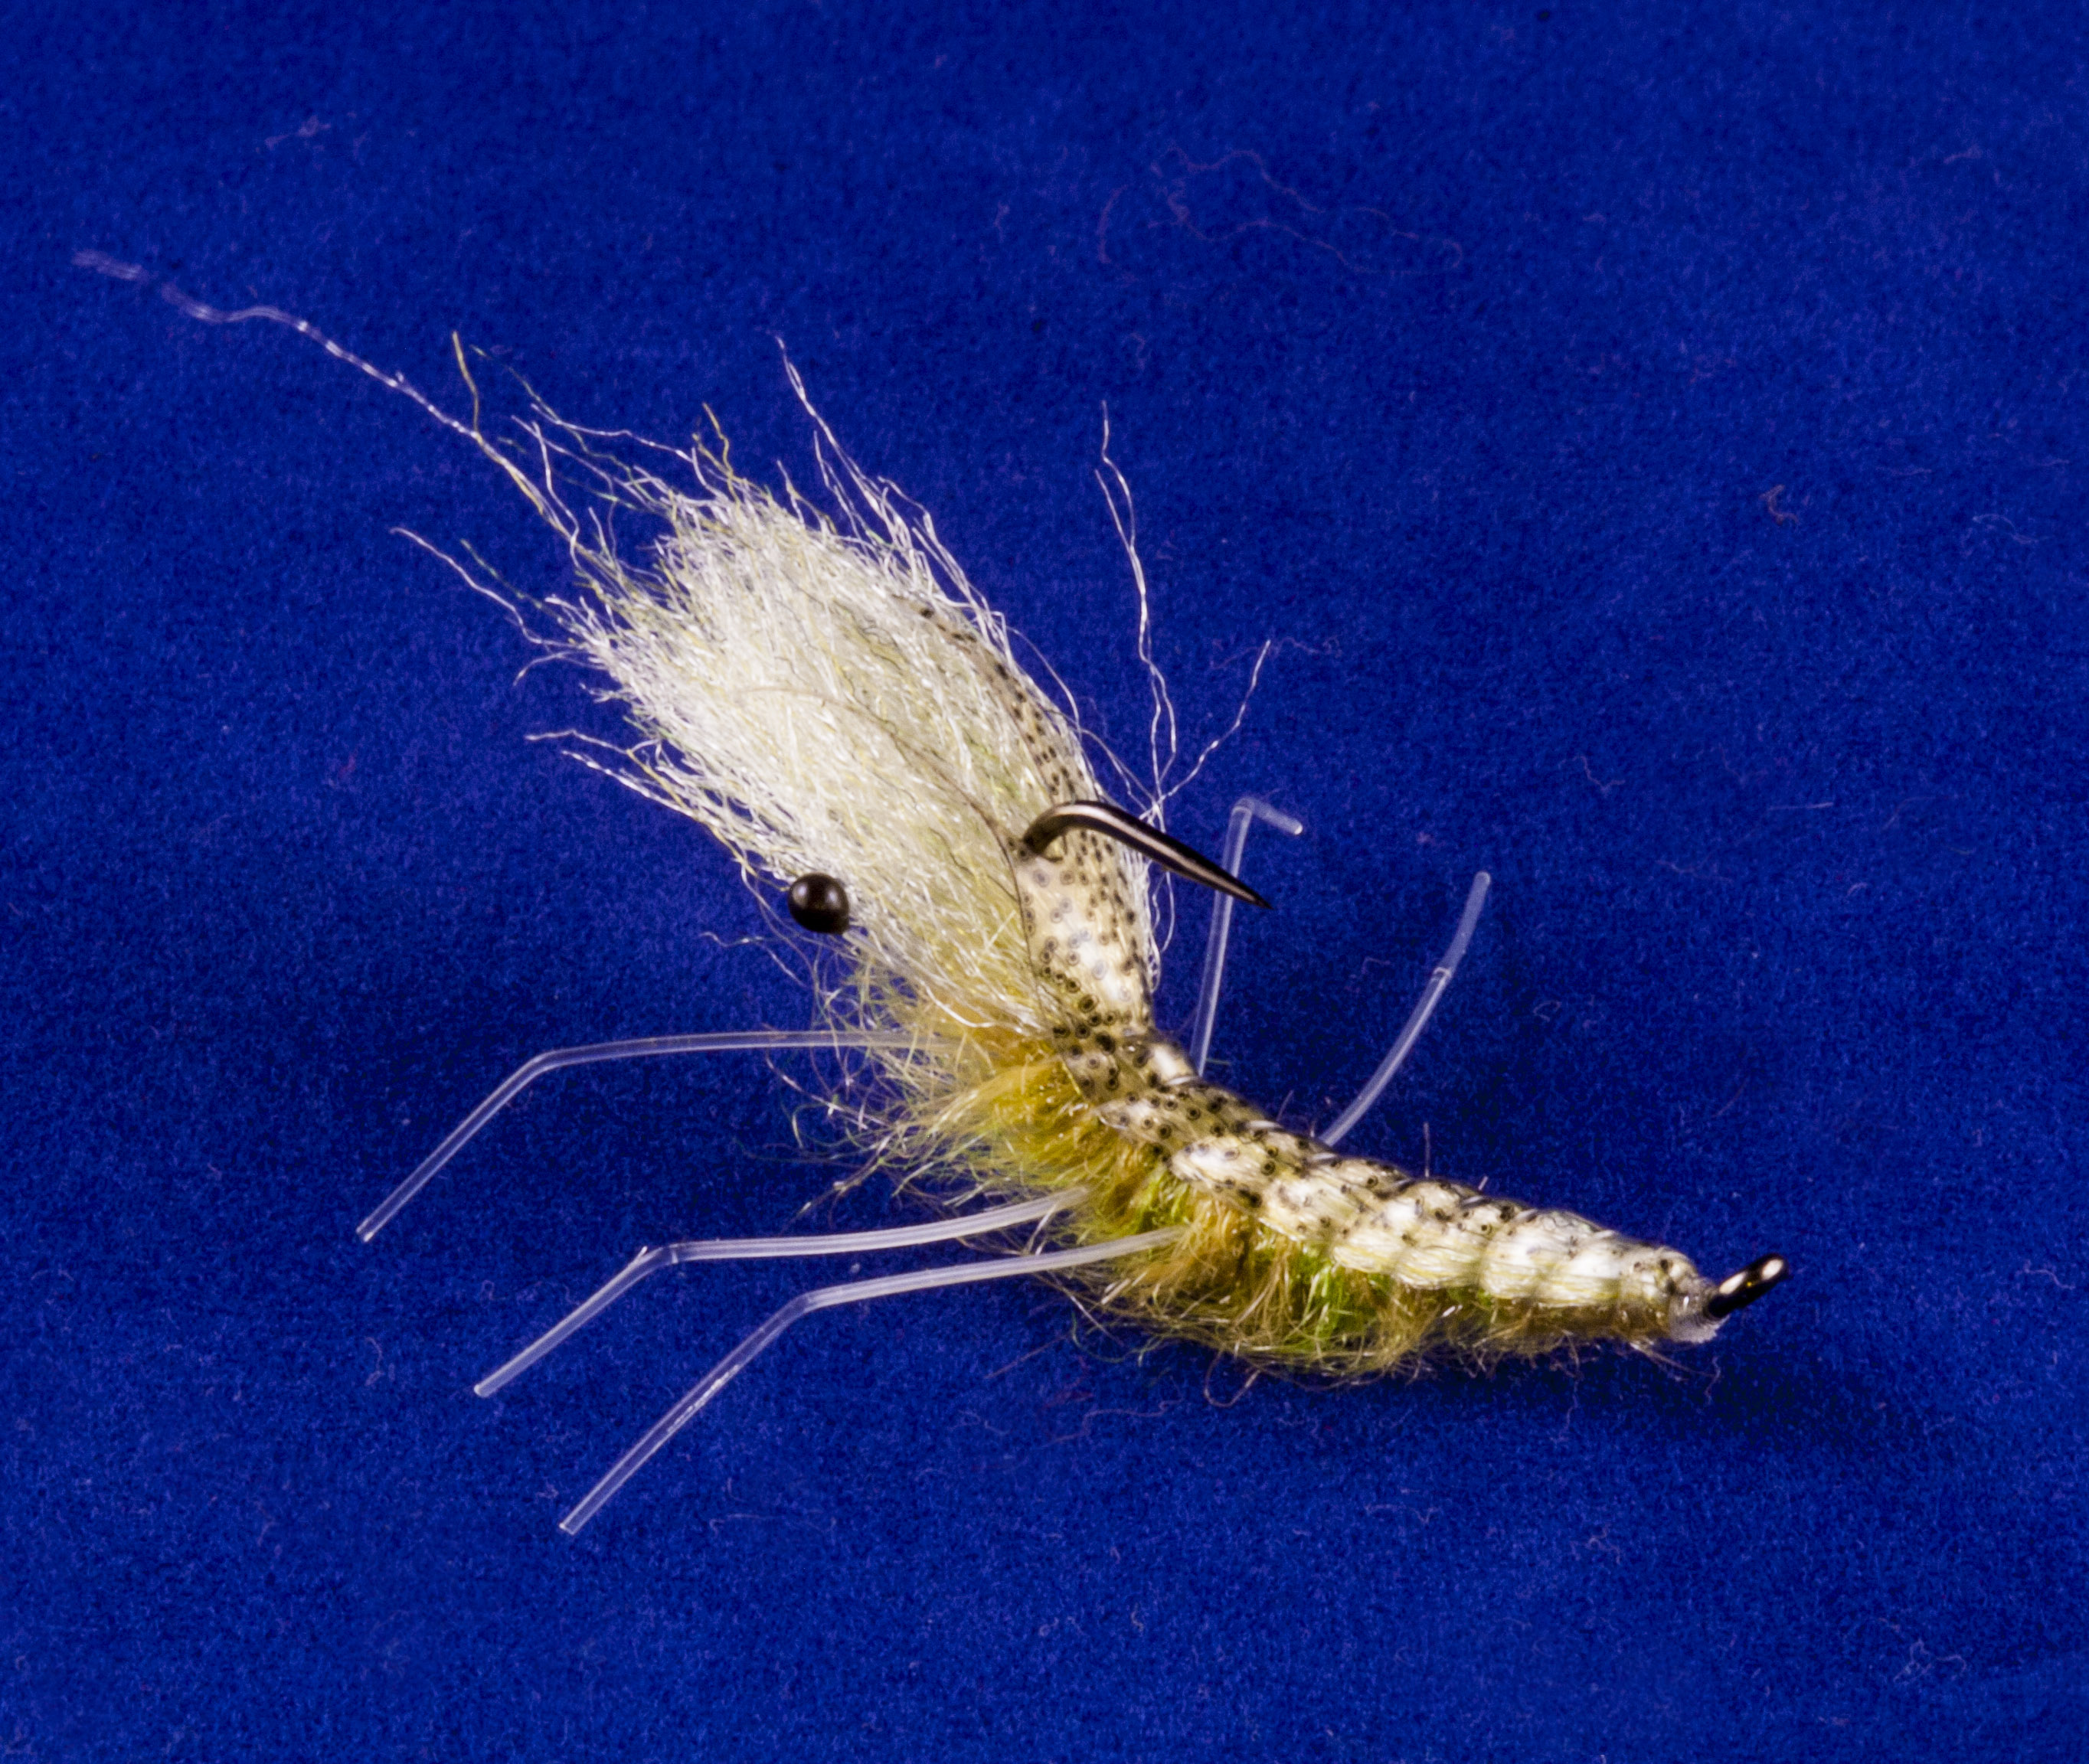
Same fly but another angle of photograph.
Hope you all like it.
Regards
Allan.

Nice one, and thanks for the Step by Step 😉
Awesome shrimp imitation 🙂
Never thanked you for an 4 pound seatrout i got on this fly! 😉 cheers
I’d rather have Lin Dans WC-final T-shirt!!!